Unleash precision in your kitchen
What if you could check if a cake is properly baked or fish is perfectly cooked without even opening the oven?
With Thermomix® Sensor, you take the guesswork out of it. Each food has its unique cooking point and the precision technology of Thermomix® Sensor means you will achieve it every time.
From Sunday roasts, to birthday cakes, homemade breads, summer barbies and more – it's all sorted with Thermomix®, Thermomix® Sensor and the Cooking Center app.
● Enjoy the Guided cooking outside the Thermomix® mixing bowl for your oven, stovetop and barbecue
● Ensure greater food safety by guaranteeing the right core temperature
● Monitor your cooking status in the Cooking Center of your Thermomix® TM6 and get notifications also on your mobile
● Obtain chef quality cooking results
● Simple to use: take the probe out of the charger and follow the instructions on Thermomix® TM6 and the app
● Reliable Bluetooth® system.
Getting started with Thermomix® Sensor is quick and easy (for detailed guidance see the Instruction Manual and Welcome Booklet):
Check the status of your cook at any time from the Cooking Center on your Thermomix® TM6 screen.
Whether in Guided Cooking mode or cooking manually, click on the Cooking Center menu at the top of your screen and access:
● Your recipe status: remaining cooking, time, current and target temperature and speed.
● Timer
● Thermomix® Sensor

Beef, pork and lamb
Steaks and chops – insert Thermomix® Sensor horizontally from one side of the steak/cut.
Big cuts of beef, pork or lamb (e.g. roasts) - insert Thermomix® Sensor diagonally from the top.
Cuts with bones - insert Thermomix® Sensor diagonally from the top, be sure to avoid the probe touching any bones.
Always ensure the probe is inserted into the meat with the reference notch entirely covered.
Poultry
Whole birds - insert the probe in the thickest part of the breast, ensuring the probe does not touch any bones.
Breasts - insert the probe horizontally in the thickest part of the cut.
Always ensure the probe is inserted into the poultry with the reference notch entirely covered.
Fish
Fillets - insert probe horizontally in the thickest part.
Whole fish - insert the probe in the thickest part and avoid touching the spine and bones.
Always ensure the probe is inserted into the fish with the reference notch entirely covered.
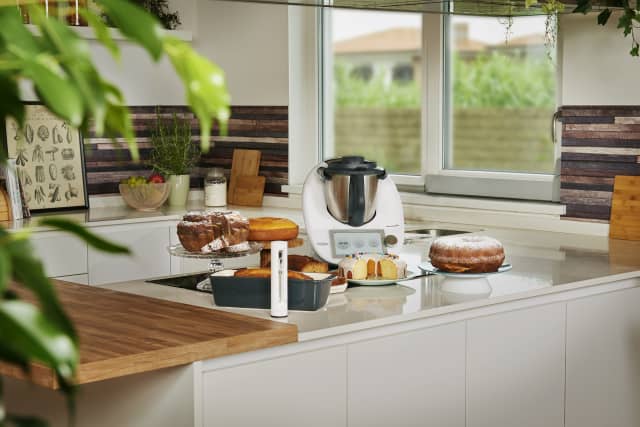
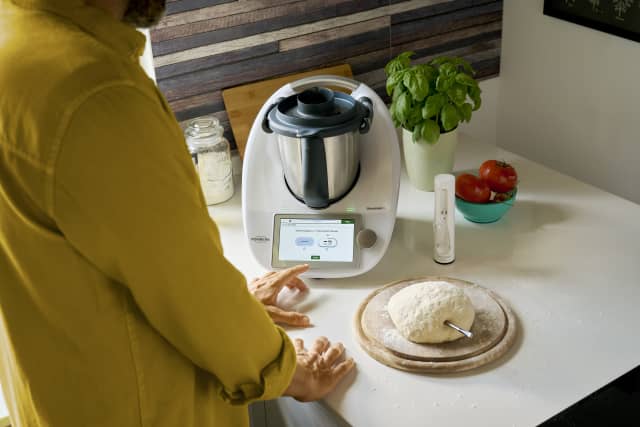
Bread
Insert the Thermomix® Sensor into the dough ensuring the tip is in the core of the dough and the reference notch entirely or close to the dough surface. If the dough is not firm enough to hold it, use a baking tin and the holder to keep the probe in place. Make sure the tip of the probe does not touch the baking tin.
Cakes
Use the holder to keep Thermomix® Sensor in the right position, whether it is a thin or thick batter.
Thermomix® Sensor is suitable for most of your kitchen appliances: oven, barbecue and on the stove.

Before cleaning, allow the probe to cool down.
Clean the probe and the holder after every use, with water and washing-up liquid. Do not use cleaning products with alcohol, ammonia, benzene or abrasives as these could damage the device.
Do not place the probe under water for long periods of time.
Before putting it back in the charger, make sure the probe and holder are totally dry.